Arduino (Getting started)_ Installing Software安裝軟體
Step 1:
| 安裝軟體教學影片
請觀看以下影片或是按照以下步驟學習安裝Arduino到你的電腦吧。 影片 |
Step 2:
| 安裝Arduino
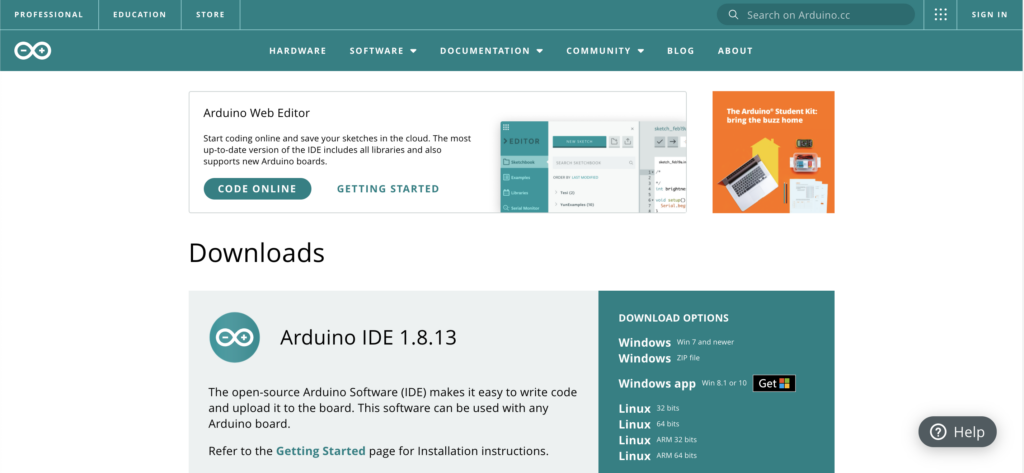
Arduino是一家開源軟/硬體公司,也就是任何人都可以免費下載使用該軟體!請到Arduino官網選擇最適合你電腦操作系統的套裝軟體下載並安裝。
|
Step 3:
| 安裝
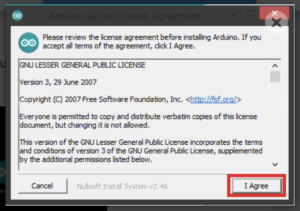
下載後請打開並開始安裝程序
|
Step 4:
| 套裝選擇
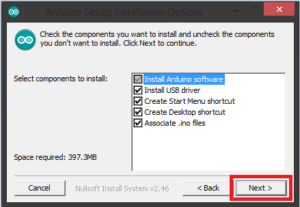
請選擇所有組件,你不需要一一把程式捷徑設立在每個地方,但我們建議你設在一個方便的位置,讓後續操作更輕鬆。
|
Step 5:
| 完成安裝
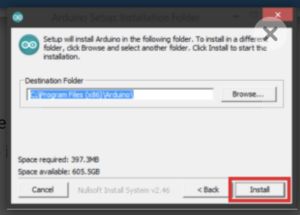
選擇”安裝”在預設資料夾中啟動安裝程序。
一旦完成安裝Arduino,請關閉畫面你就會在桌面上或是開始功能表單裡看到Arduino捷徑圖標。
|
Step 6:
| 安裝CoDrone資料庫
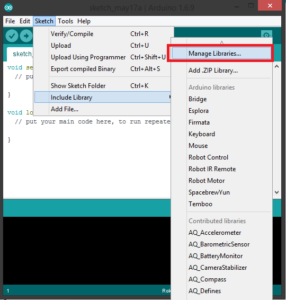
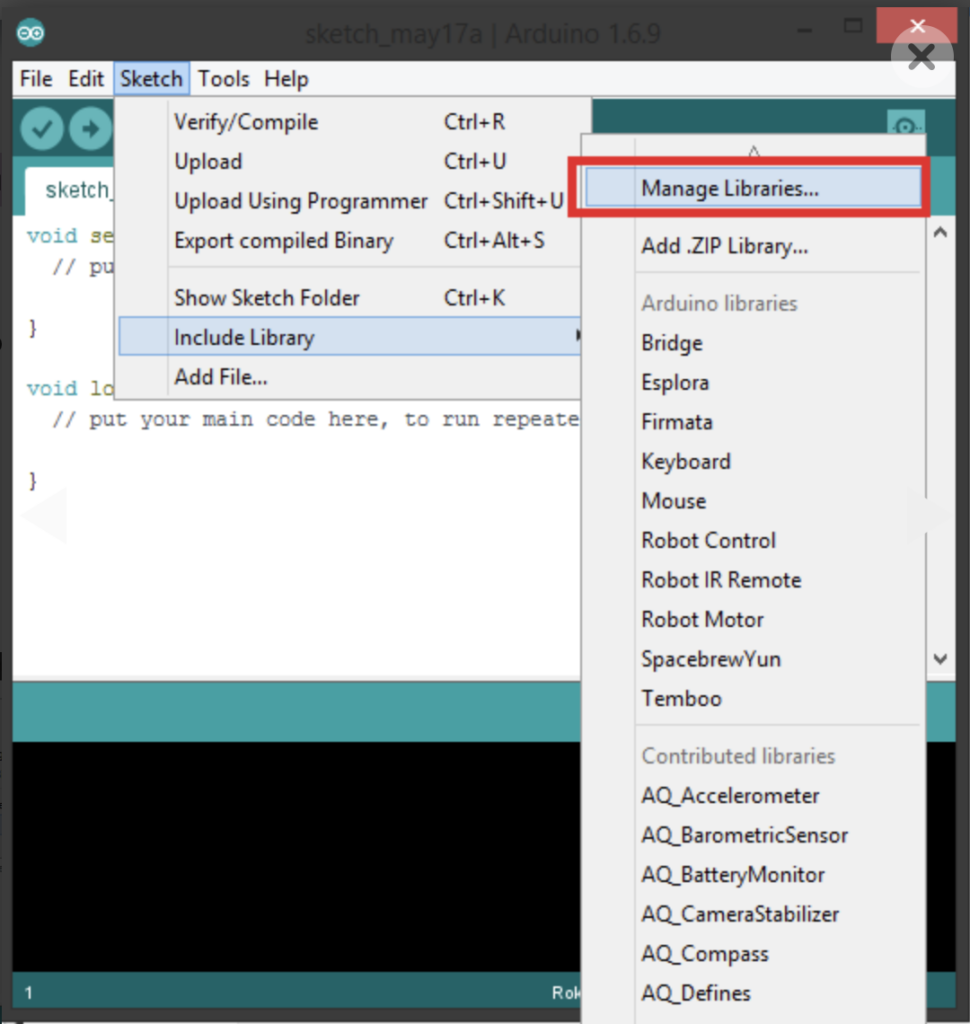
Robolink創建了許多CoDrone函式並把它們放在Arduino的CoDrone資料庫中。你可以透過 Arduino 資料庫管理器安裝 CoDrone 資料庫來使用函式。 第一步請開啟Arduino再點擊Sketch(草稿碼) > Include Library(匯入資料庫) > Manage Libraries(管理資料庫)
|
Step 7:
| 程式庫管理員
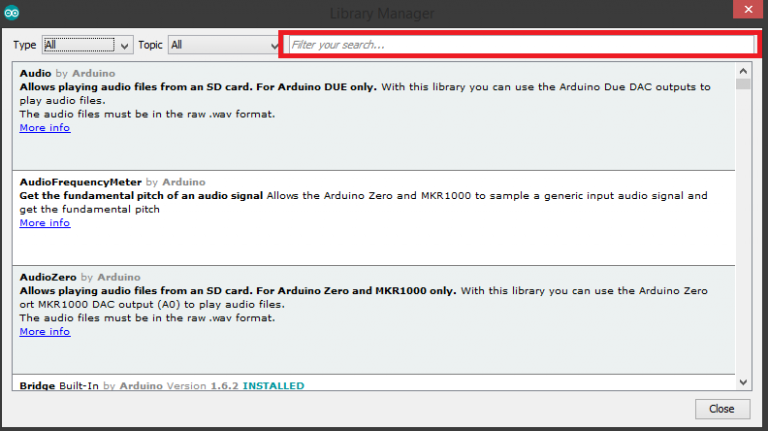
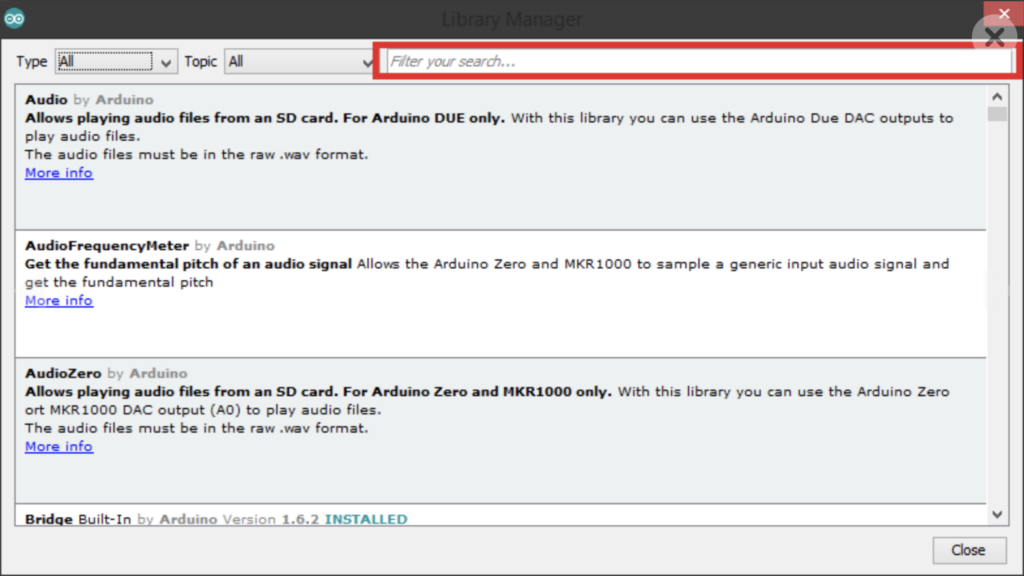
資料庫管理員對話框會立即出現,請在搜尋框裡打上並尋找”CoDrone”
|
Step 8:
| 安裝CoDrone資料庫
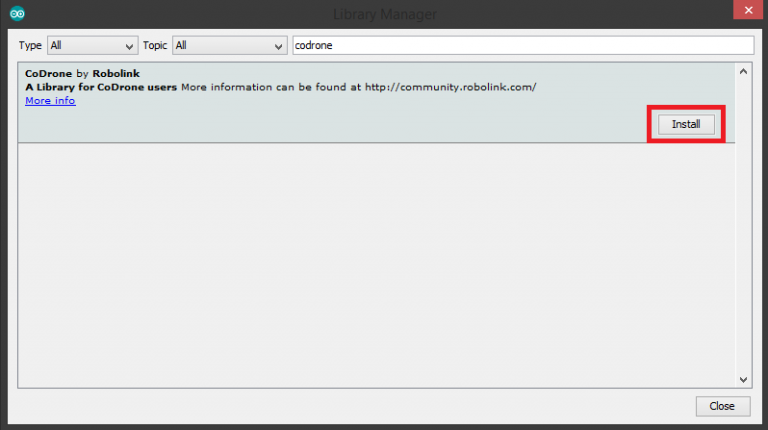
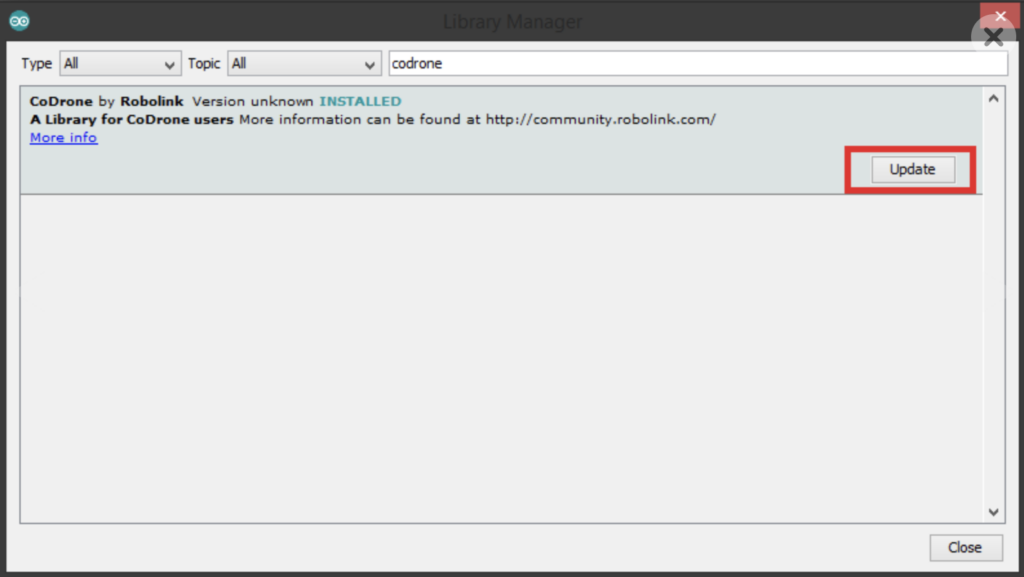
搜尋結果會出現” CoDrone by Robolink”,如果你的搜尋結果沒有出現CoDrone資料庫,那就是你需要更新Arduino IDE啦! 請點擊更新。 下一步請選擇資料庫並點擊安裝按鈕(Install)進行安裝!
|
Step 9:
| 確認安裝
你會看見資料庫旁邊出現INSTALLED(已安裝)代表你已經安裝完畢,請記得經常更新你的資料庫!
|

Arduino (Getting started)_ Uploading Programs to the Remote上傳編程
Step 1:
| 上傳預設值程式
以下影片會介紹如何上傳程式上傳飛行控制程序和其他程序。 影片: |
Step 2: 步驟2:
| Going into upload mode進入上傳模式
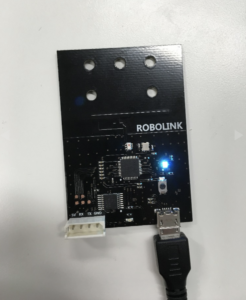
Connect your Bluetooth board to your Smart Inventor Board with the 4 pin connector. Next, connect your Bluetooth board to your computer with the micro USB cable. 請利用4個數位接腳連結藍芽板與Smart Inventor Board(智能板),再用Micro USB傳輸線連接藍芽板與你的電腦。 |
Step 3: 步驟3:
| DIP switches DIP撥桿
Get your Smart Inventor Board in upload mode by flipping DIP switch 1 on. DIP switches 2 and 3 should still be off. Next, hit the reset button (below the DIP switches). After a few seconds, a single blue LED should start blinking. 將DIP撥桿1往上撥調整Smart Inventor Board(智能板)到上傳模式。維持DIP撥桿2跟3關閉。再按下重置鈕(在DIP撥桿下方)幾秒後會看見單顆LED藍光會開始閃爍。 |
Step 4: 步驟4:
| Blue and red LEDs 藍色與紅色LED燈
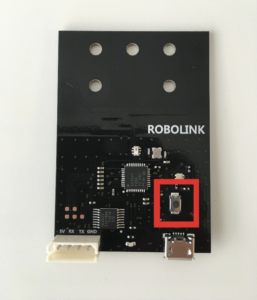
There are 2 signs that you’re in upload mode: 有2種特徵可以看出你正在上傳模式
If the LED on the Bluetooth board isn’t pulsing yellow or flashing red, press the tiny black button next to the light to see if you can cycle it into either the pulsing yellow or flashing red. 如果藍芽板上的LED紅與黃燈沒有閃爍,請按下燈旁邊的小黑鈕看看會不會讓其中一顆燈亮起。 Are the LEDs on the Smart Inventor board pulsing towards the middle instead of a single one blinking? Sometimes hitting the taller circular black reset button right next to the DIP switch will kick it into upload mode. Or, you can disconnect all power from the board, disconnect the CoDrone battery, plug everything back in, and then try again. 請觀察Smart Inventor Board(智能板)上的 LED 是否有往中間閃爍移動,而不是單一個燈在閃爍。有時按下DIP撥桿旁邊較高的圓形黑色重置按鈕也會能調整進入上傳模式。或者,你可以斷開電路板上的所有電源,移除 CoDrone 電池,重新插入所有電源,然後重試。 Make sure to check the video to see exactly what upload mode looks like! 請記得再回頭看影片確認上傳模式應該會如何呈現! You’re in upload mode now! You’ll get to know this mode really well, since you need to use it any time you want to upload a program to your remote. 你現在已經在上傳模式了,而你會透過常常上傳程式到遙控器而更熟習此模式。 |
Step 5: 步驟5:
| Selecting your board選擇board(板子)
YES! You can upload code now! Open up Arduino and go to Tools > Board to select your board. It should match the version that’s on the front of your Smart Inventor Board. For example, if you have Smart Inventor Board V2, your board should be Rokit-Smartinventor-mega32_v2. 好啦~現在你可以上傳程式碼了!開啟Arduino選擇上列Tools(工具) > Board(板子)來選擇板子。它應該與 Smart Inventor Board (智能板) 正面的版本相對應。例如:如果你手上是”Smart Inventor Board V2”,你的選項就會是”Rokit-Smartinventor-mega32_v2”。 Note: If you have a newer version of Arduino, the board may install inside of Tools > Board > Arduino AVR Boards. 備註:如果你是比較新版的Arduino ,board(板子)選項會在以下位置找到Tools > Board > Arduino AVR Boards. |
Step 6: 步驟6:
| Selecting your USB port選擇USB插孔
The COM port is related to which USB slot on your computer the controller is connected to, and how many USB devices have been plugged into the machine prior. Each new device is assigned a new COM port number. To check which port you’re connected to, go to Tools > Port. For most users, your COM port may be the only one that shows up, or you’ll see a COM1 and another COM port number! If you’re on a Mac, your port will most likely be SLAB_USBtoUART. Just as a warning: COM1 is never the correct port. 當控制器要連接到電腦上USB 插槽時,COM的插孔編號和之前有多少USB裝置插入機器中有關。每個新的裝置都有一個新的COM插孔號碼。想要確認你連上的是哪一個COM,請至上列選項Tools (工具)> Port(插孔)。對多數使用者來說,你只會看ㄆ到唯一的COM插孔,或是你會看到COM1與其他COM插孔號碼!如果你用Mac作業系統,你的插孔正常會出現 ”SLAB_USBtoUART”。 特別警示:COM1永遠都不會是正確的插孔! Can’t remember which board or port you’re on? Check the bottom lefthand corner of Arduino, and it will have your board and port in order! For example, if you have Smart Inventor Board V2 and you’re on COM 4, you’ll see something like Rokit SmartInventor-mega32_v2 on COM 4. 如果你忘記你連接的是哪個插孔,請確認Arduino左下角它會按順序排列你的板子和插孔。例如:如果你擁有的是Smart Inventor Board V2而你接上的是COM 4你就會看到” Rokit SmartInventor-mega32_v2 on COM 4”。 |
Step 7: 步驟7:
| Uploading code上傳程式碼
Ready to upload a code? In Arduino, go to File > Examples > CoDrone > Control > FlightController to upload the default flight controller program. Click the upload button (arrow pointing right) to start the upload. If everything goes well, the bottom console should say “Done uploading.” 準備好上傳程式碼了嗎?請至File(檔案) > Examples(範例) > CoDrone > Control (控制)> FlightController(飛行控制器)上傳預設飛行控制器程式。點擊上傳按鈕(箭頭向右)進行上傳動作。如果一切過程順利,底部會出現” Done uploading(上傳完畢)”。 After you’re finished, don’t forget to exit upload mode by flipping DIP switch 1 back to the off position. Good luck and happy coding! 完成後別忘記將DIP撥桿上撥離開上傳模式。 祝你上傳程序過程順利開心! |
Arduino (Getting started)_ Installing Hardware Files安裝硬體資料
Step 1:
| 軟體開發環境設定
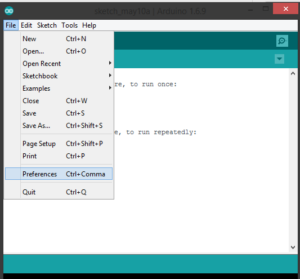
開啟Arduino。如果你是使用微軟系統Windows,請至File (資料夾)> Preferences(軟體開發環境設定);如果你是使用蘋果電腦Mac,請至Arduino > Preferences(軟體開發環境設定)。
|
Step 2:
| 加入連結
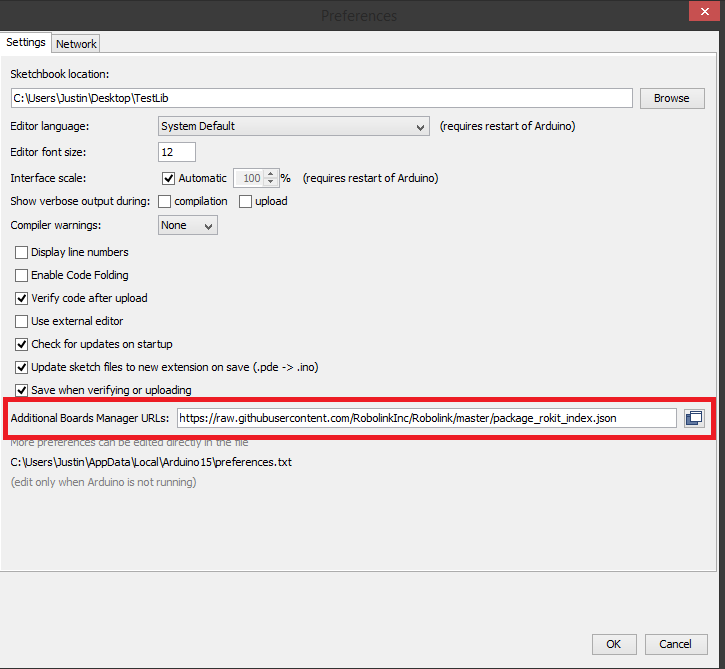
你會看到螢幕彈出設定檔的視窗。找到Additional Boards Manager URLs
(新增板管理員網址)並貼上以下網址在裡面: https://raw.githubusercontent.com/RobolinkInc/Robolink/master/package_rokit_index.json |
Step 3:
| 搜尋過濾器
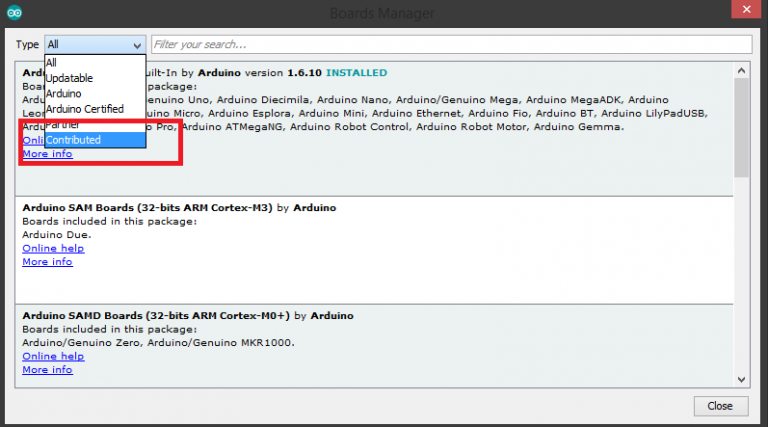
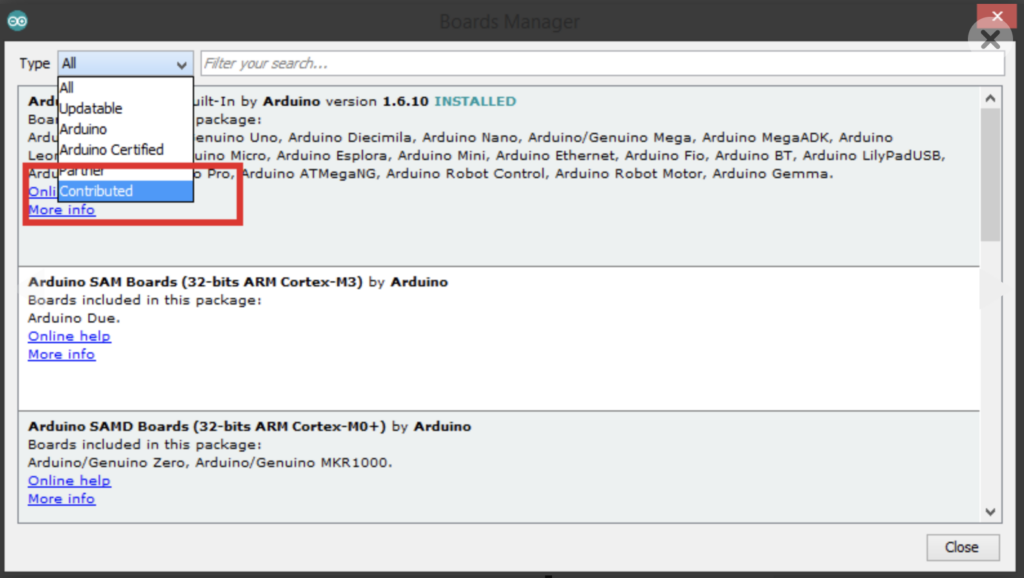
點擊OK並關閉設定檔視窗。接著找到Tools (工具)> Boards (板子)> Boards Manager(板子管理員),將左上方Type(類型)格子選項從All(全部)改成Contributed(另外加裝)
|
Step 4:
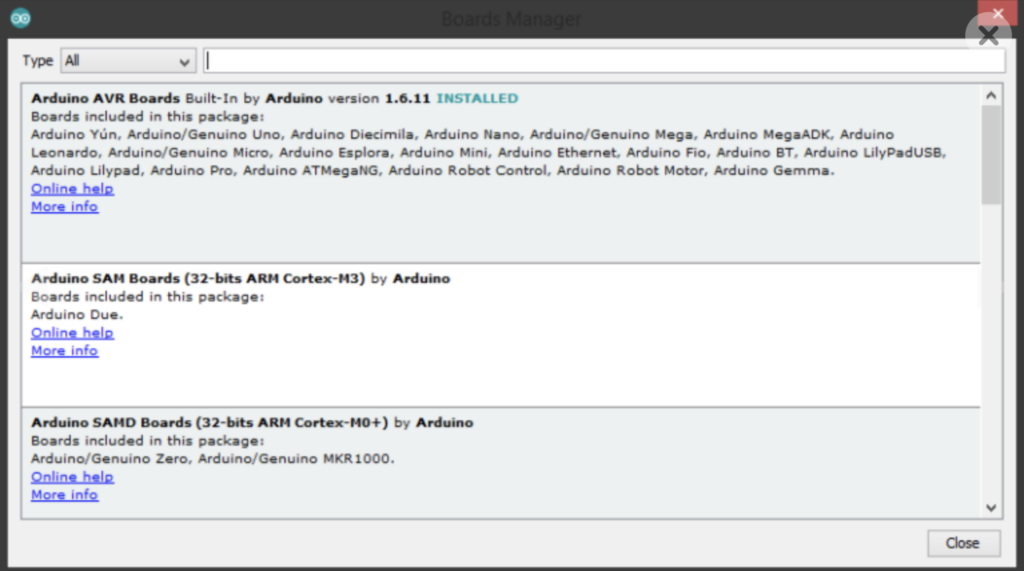
| 安裝
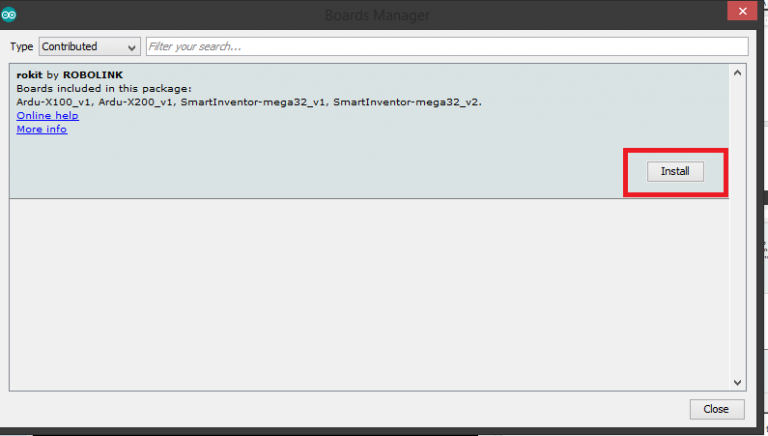
找到“rokit by ROBOLINK.”套裝軟體。如果顯示”安裝完畢”代表你已經成估完成安裝即可跳過此步驟。如否請點擊並安裝此套裝。
|
Step 5:
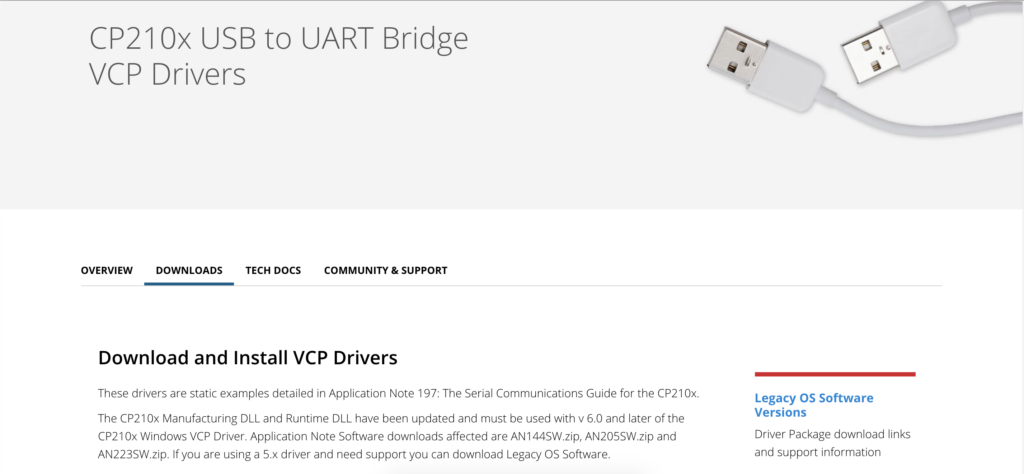
| 選擇正確USB驅動程式
最後,請為你的Smart Inventor Board(智能板)安裝USB驅動程式。請從Silicon Labs(芯科實驗室)網站下載。從此頁面根據你的操作系統選擇並點擊在“Software”(軟體)那欄下方的“Download”(下載)。如果你的操作系統是Mac請跳至步驟8
|
Step 6:
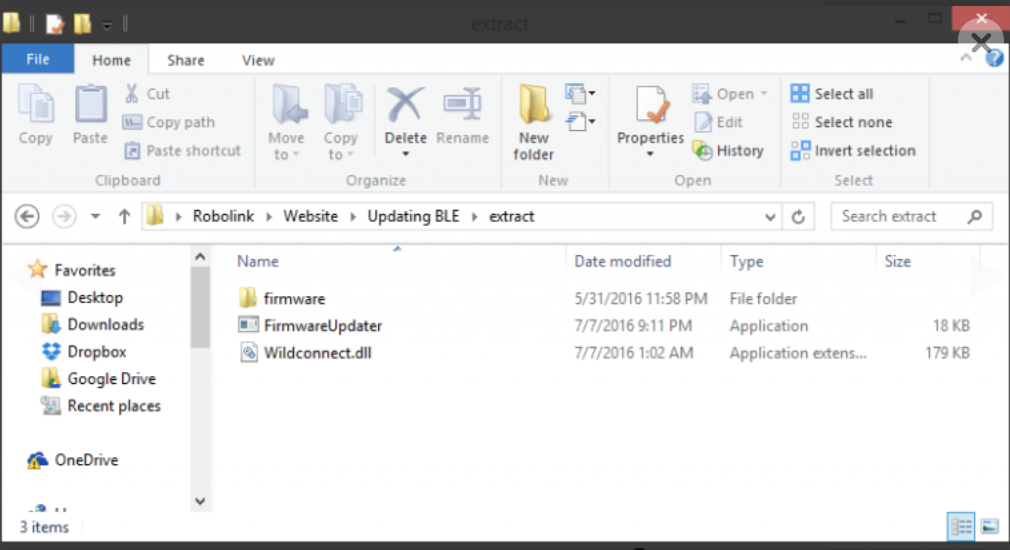
| 提取套裝軟體
在桌面儲存此檔案,完成檔案下載請提取/解壓縮/解壓縮至新資料夾,並讓檔案‘CP210xVCPInstaller_x…exe’變更你的裝置。 如果你用的是微軟Windows你可以透過點擊”開始功能表”(在本機或我的電腦)選擇”屬性”知道你的操作系統是x64或x86 位元。
|

Step 7:
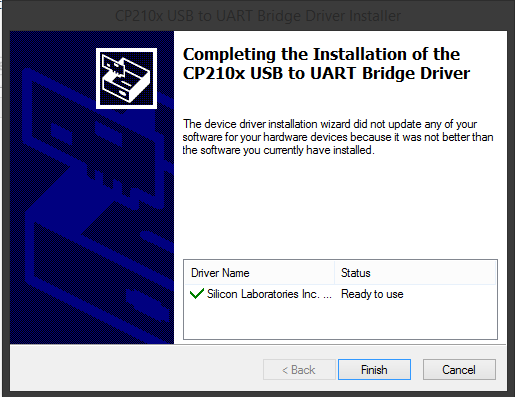
| 完成安裝
最後,運作安裝程序,如果所有過程都順利,恭喜你已經完成安裝驅動程式!
|
Step 8:
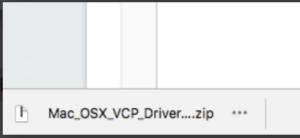
| 安裝驅動程式在Mac
在Silicon Labs(芯科實驗室)網站下載好USB驅動程式後,雙擊zip壓縮檔。
打開DMG檔案。
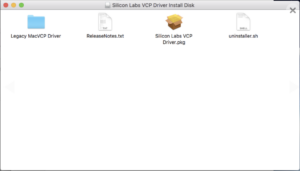
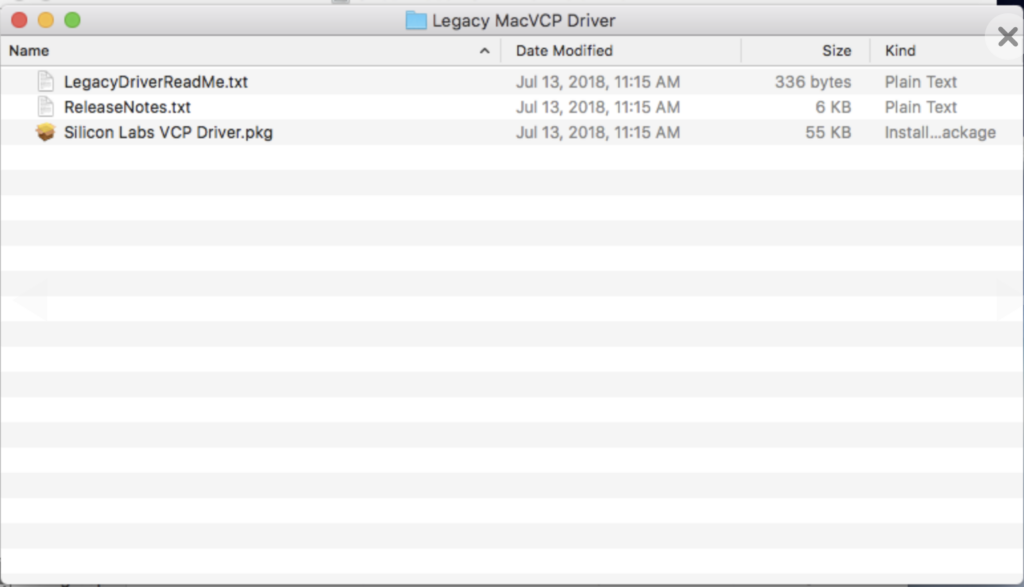
按照安裝視窗提供的指示動作 打開“Legacy MacVCP Driver”資料夾(絕對不要在此資料夾開啟“Silicon Labs VCP Driver.pkg“)
雙擊“Legacy MacVCP Driver”資料夾內的“Silicon Labs VCP Driver.pkg”。
按照安裝視窗出現的指示即可完成安裝。 |

Arduino (Getting started)_ Updating CoDrone 更新codrone
Step 1:
| 更新CoDrone資料庫
開啟Arduino,選取Sketch (草稿)> Include Library(加入資料庫) > Manage Libraries(管理資料庫)…
在彈出的資料庫管理員視窗中,在右上角的搜尋欄裡搜尋CoDrone。
選項中應該會出現CoDrone by Robolink。如果你沒看到CoDrone資料庫,請更新你的Arduino IDE,選擇資料庫並更新。
|
Step 2:
| 更新板子資料
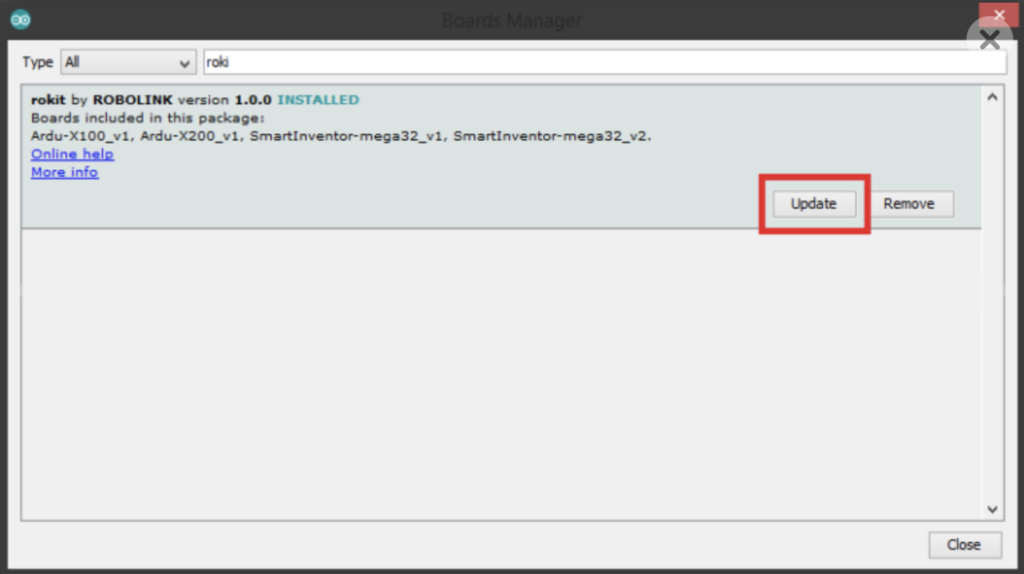
開啟Arduino游標選取Tools (工具)> Boards(板子) > Boards Manager(板子管理員)
在搜尋中找出rokit by ROBOLINK。點擊隨意一處再點擊Update(更新)按鈕
|
Step 3:
| 更新CoDrone韌體
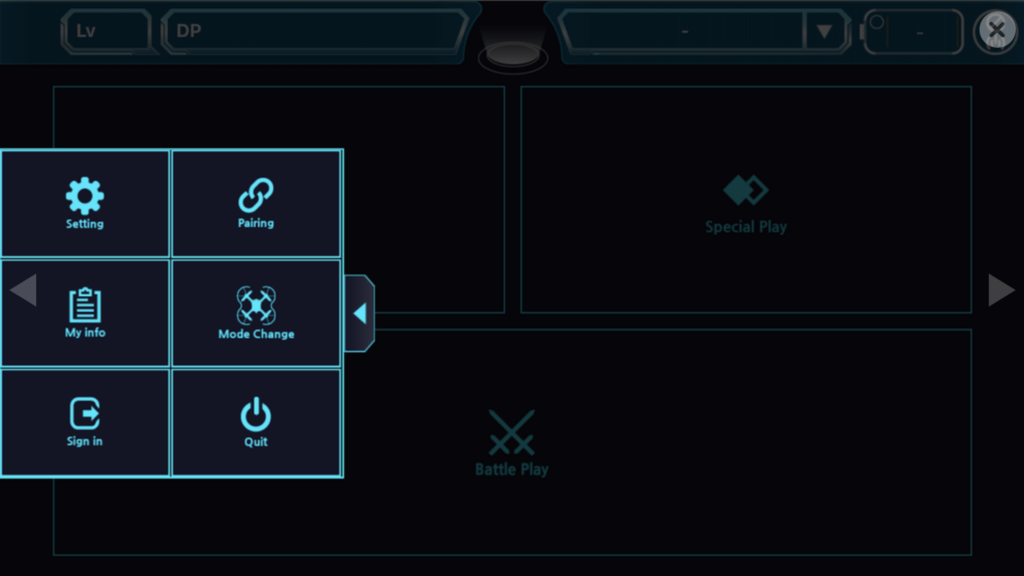
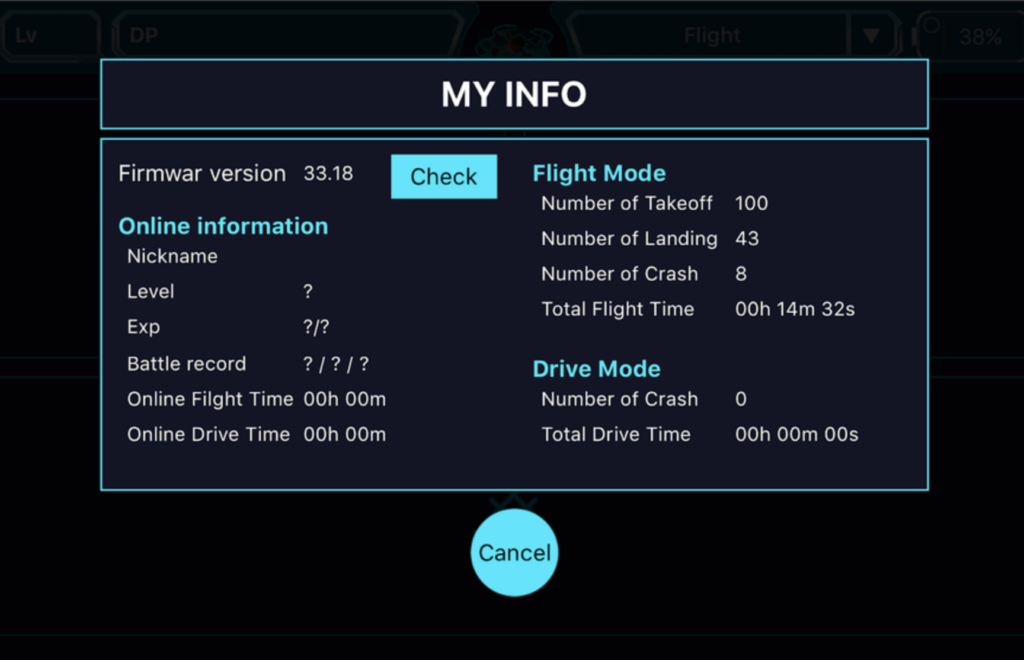
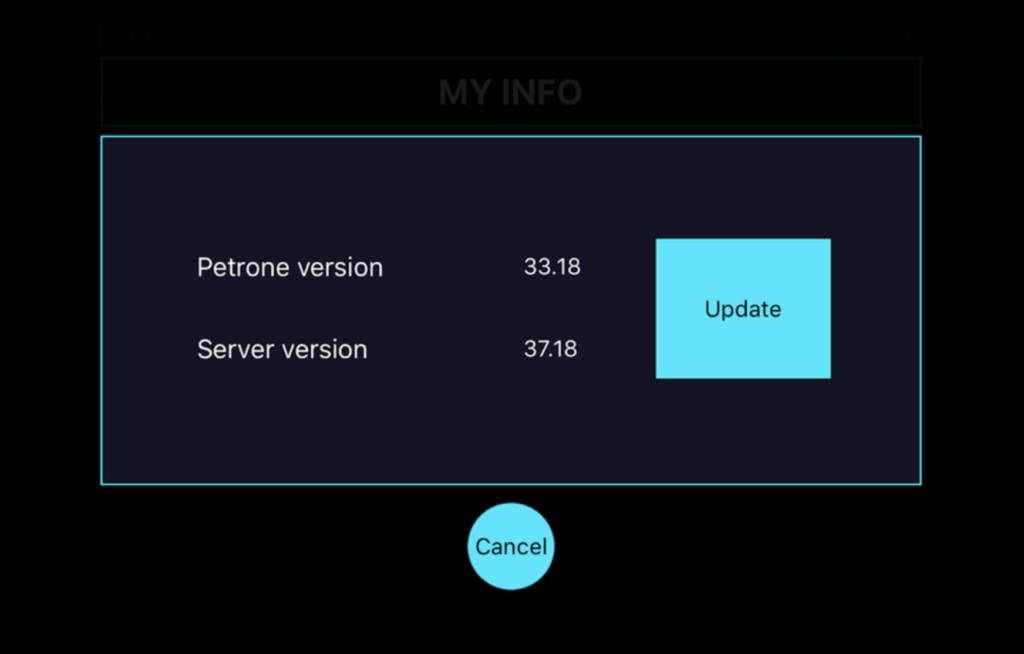
請在開始更新前確認你的CoDrone電池與手機設備都已經充飽電!目前你可以使用我們合作夥伴Byrobot建置的行動app叫做Petrone來更新你的韌體。你可以純粹將app用在飛行。 1. 請從手機裡App Store或Google Play(應用程式商店)下載Petrone。 2. 啟動你的CoDrone並開啟APP。你也能順便註冊一個帳號或是跳過此步驟。 3. 與手中CoDrone配對後點擊尋找“My Info”(我的訊息) (在左側的剪貼板裡的圖標)
|
Step 4:
| 更新藍芽模組
目前只有微軟作業系統Windows可以做到更新。所以我們後續會在為Mac用戶更新可用版本! 1.連接藍芽模組時按住重置鈕
3.下載藍芽韌體更新器 4.解壓縮提出檔案和程序
|